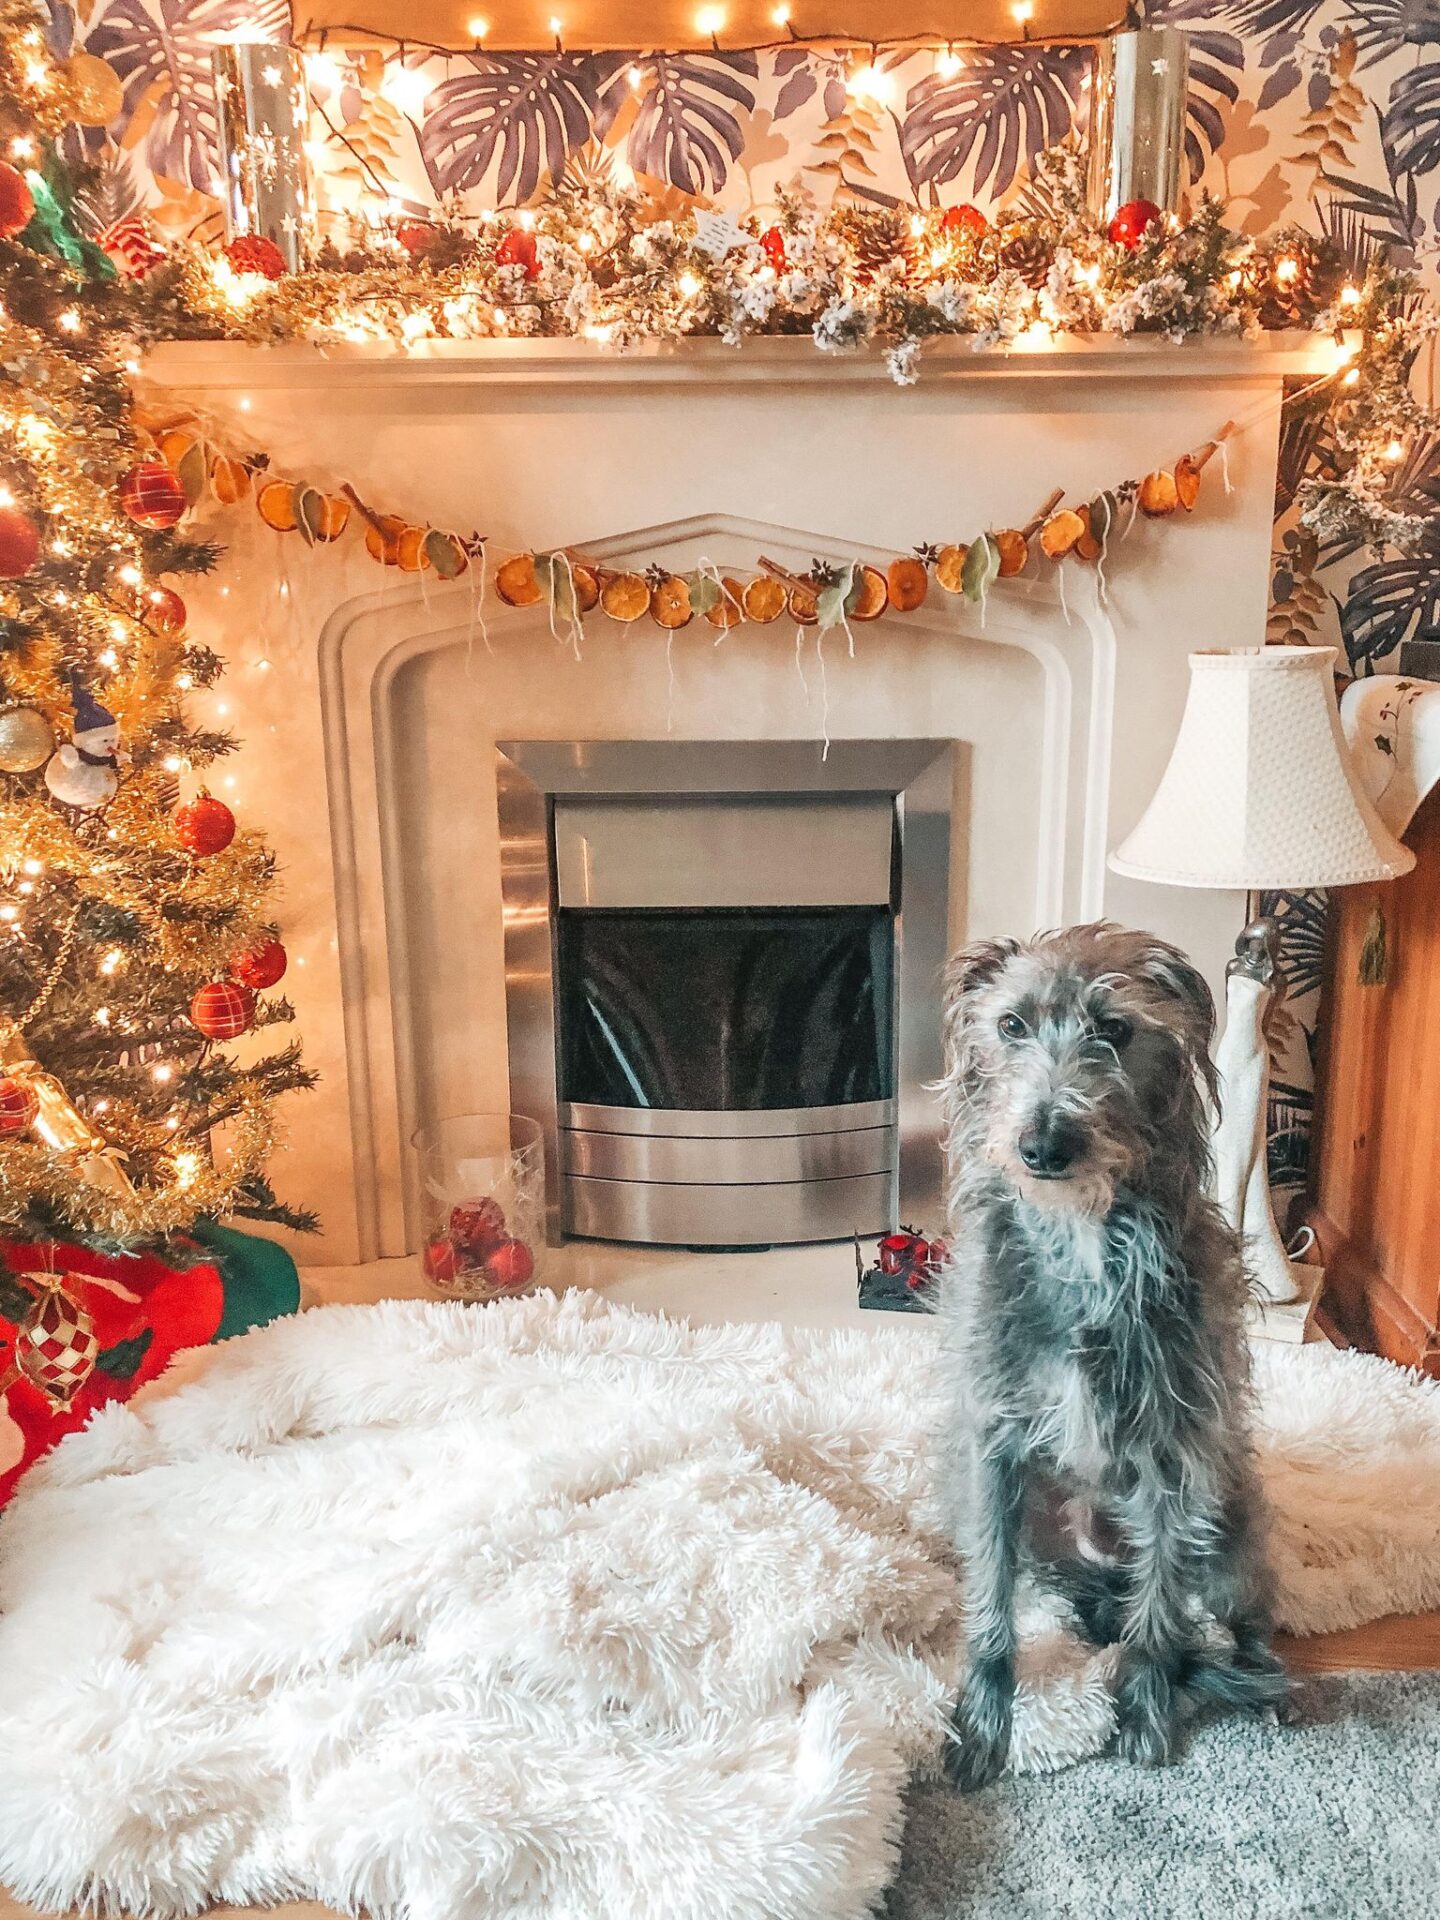
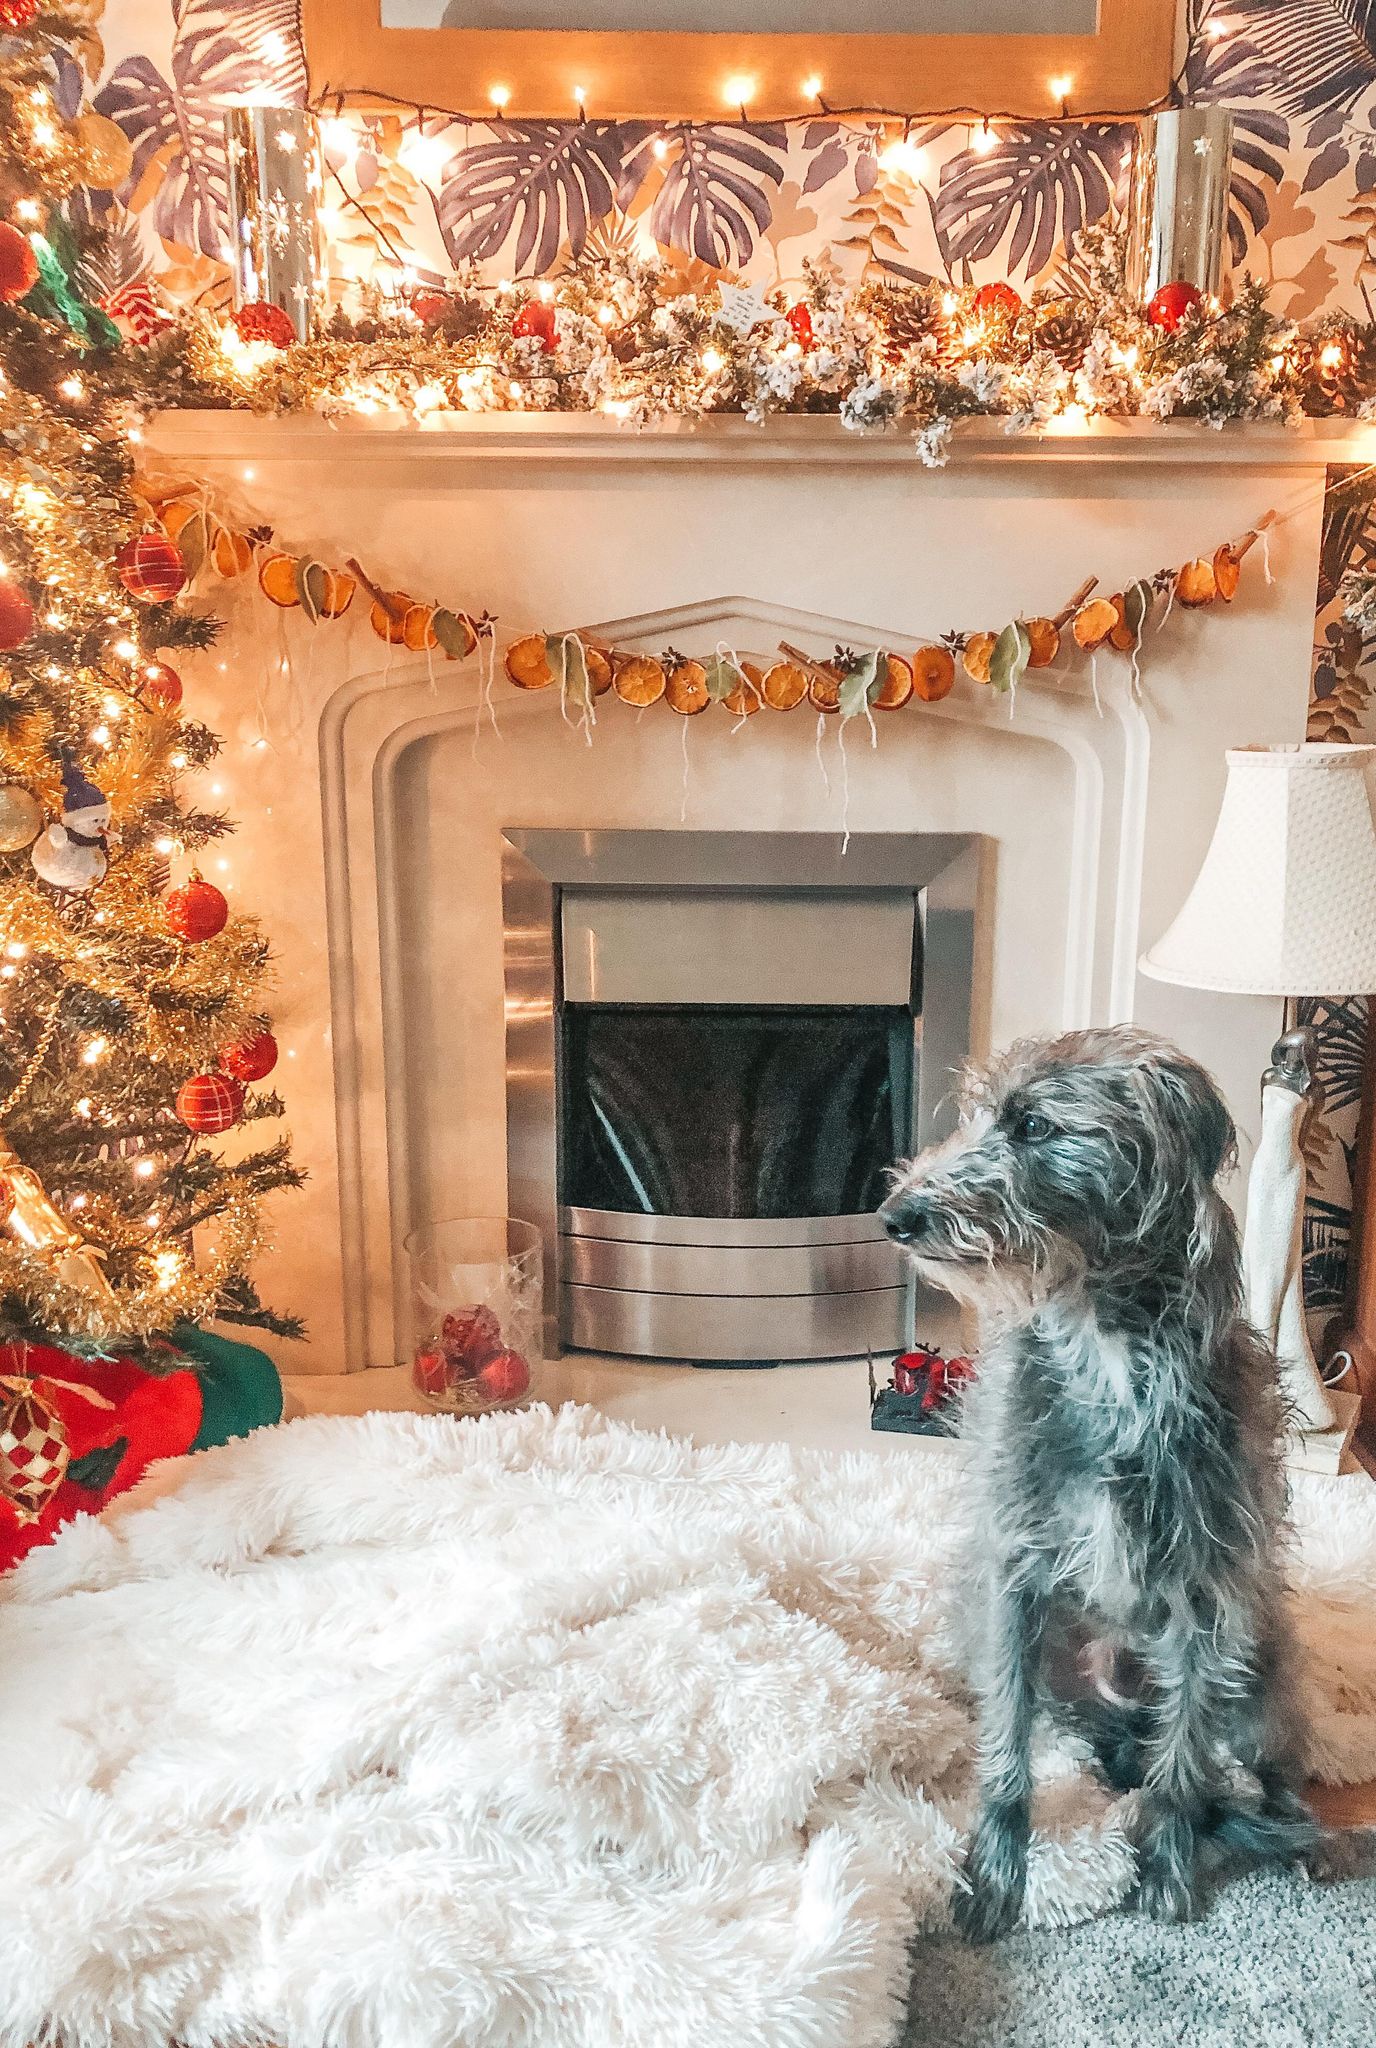
If there’s anyway to make a Christmas decoration, and do it cheaply, and make it so that it makes the house smell great, then call me Kirsty Allsopp and grab me a craft kit. I know I’m always saying it, but I still live at home at the moment, so I have my room to work with, and other than that I’m a little limited, but I’ve always wanted to have a go at making a dried orange garland. I decided that this year is the year, and here’s how it was done.

You will need…
4-5 oranges
Brown string/wool
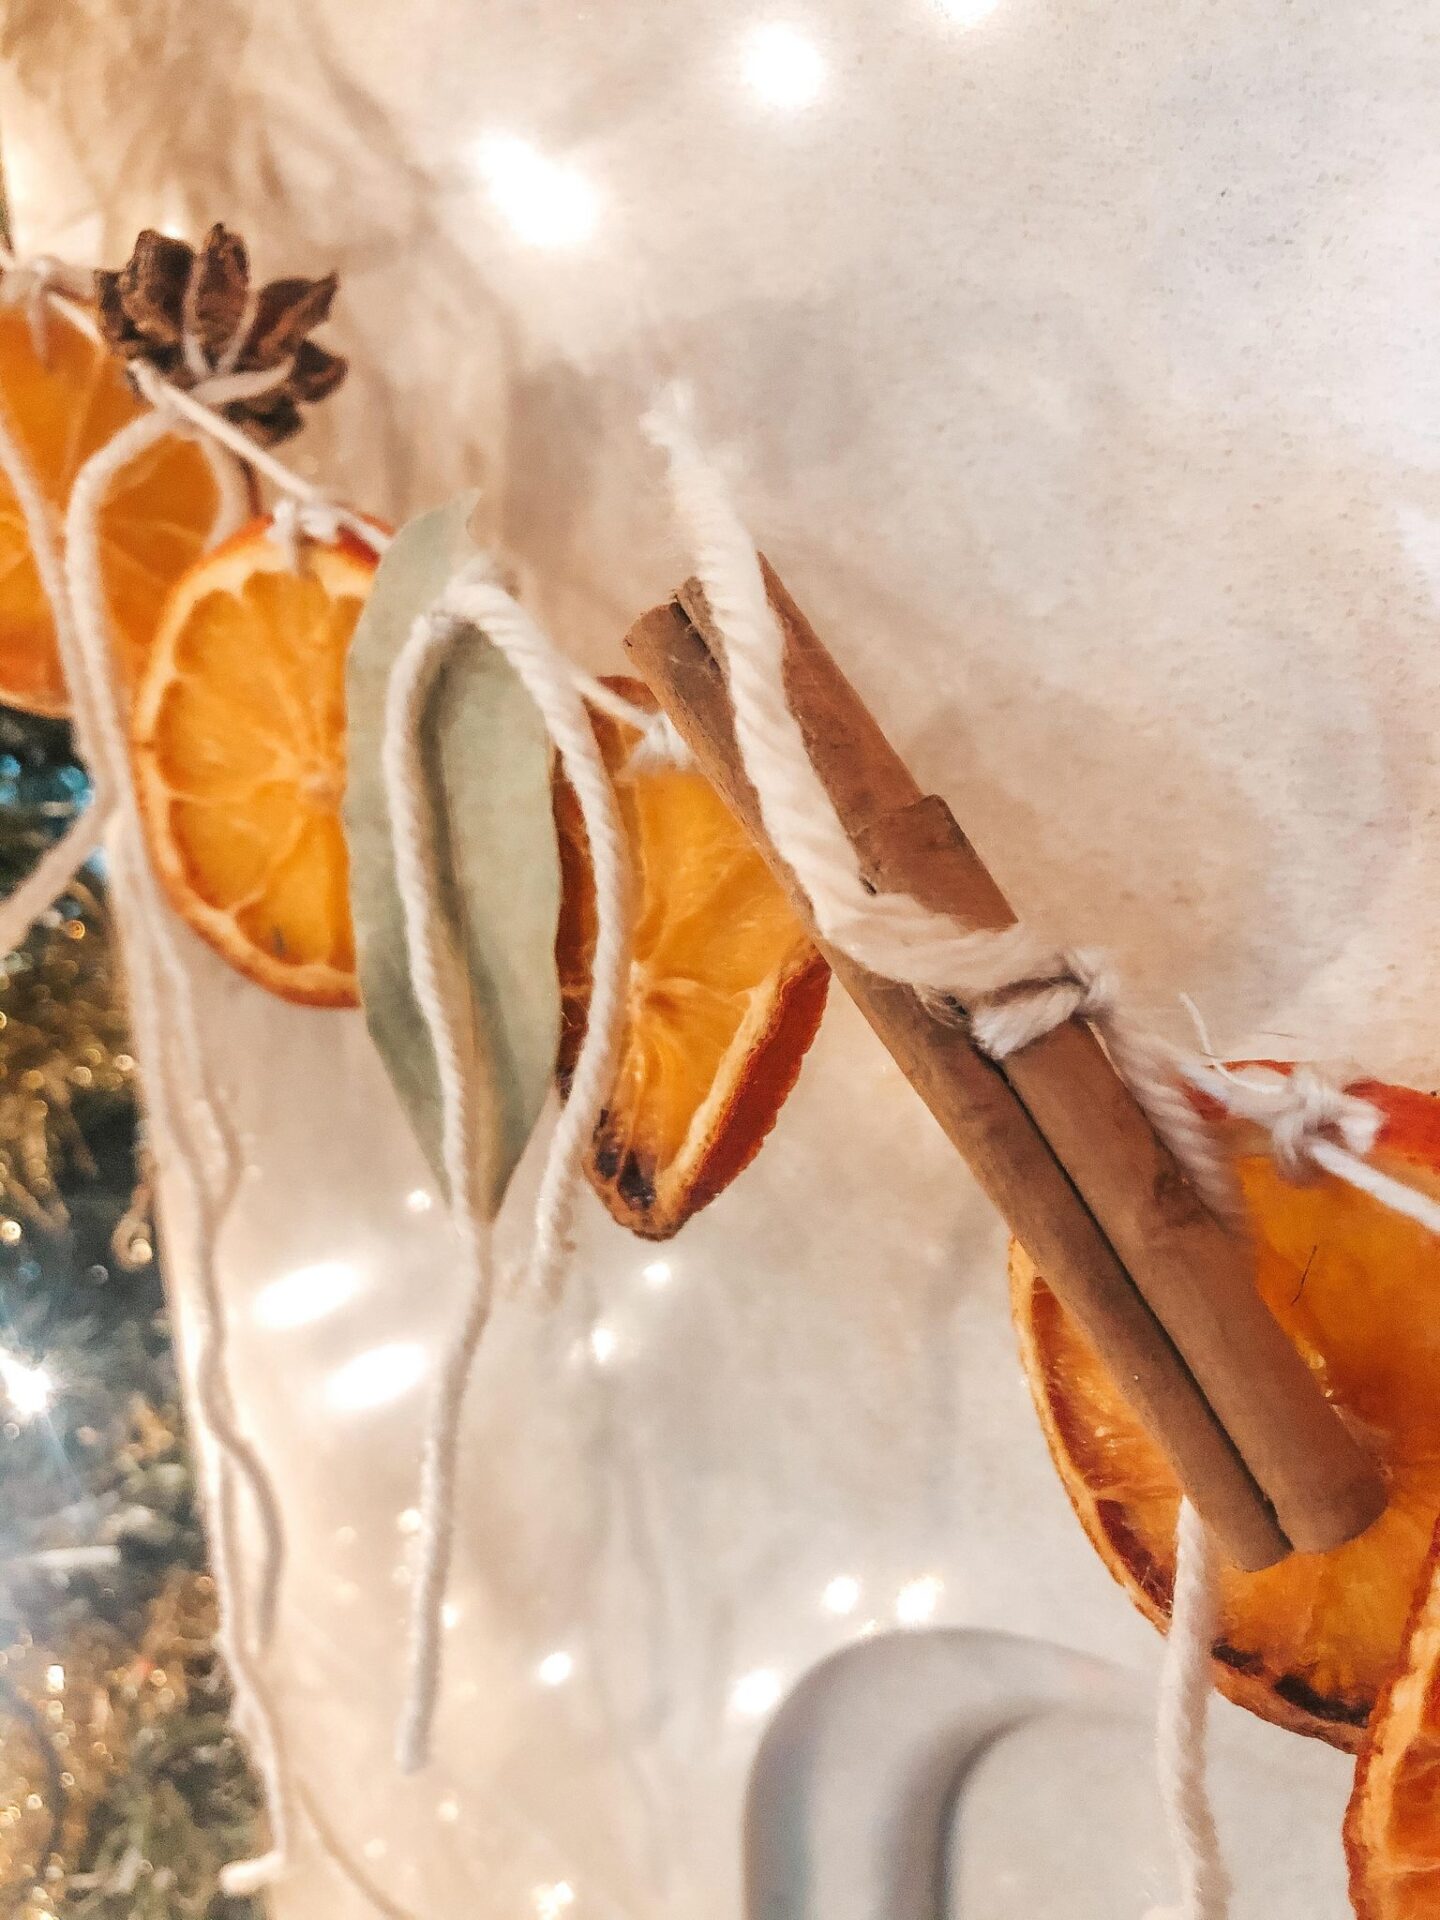
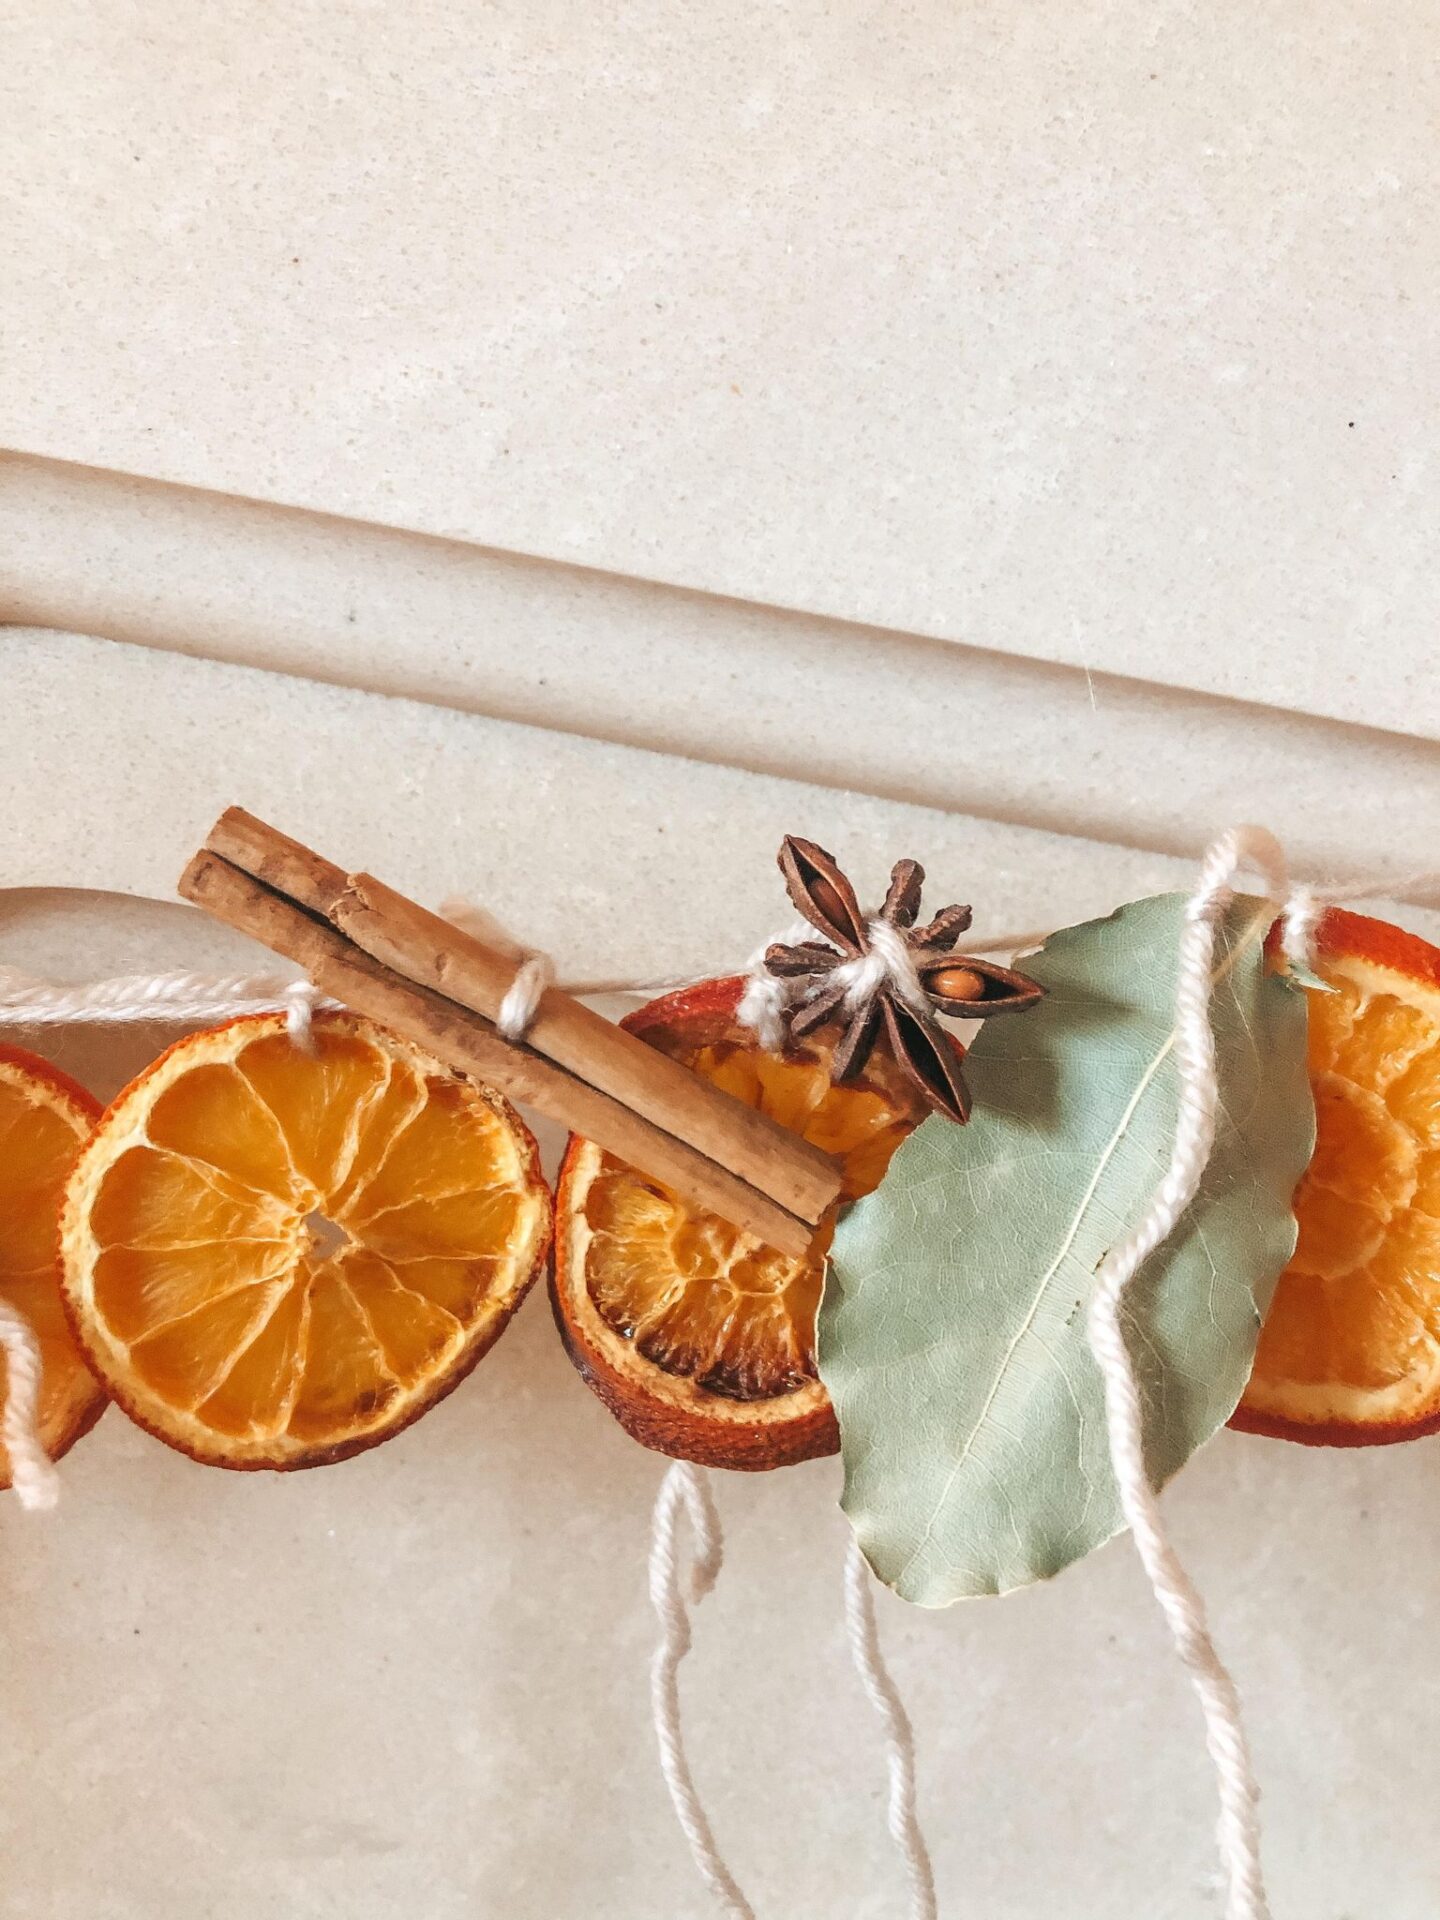
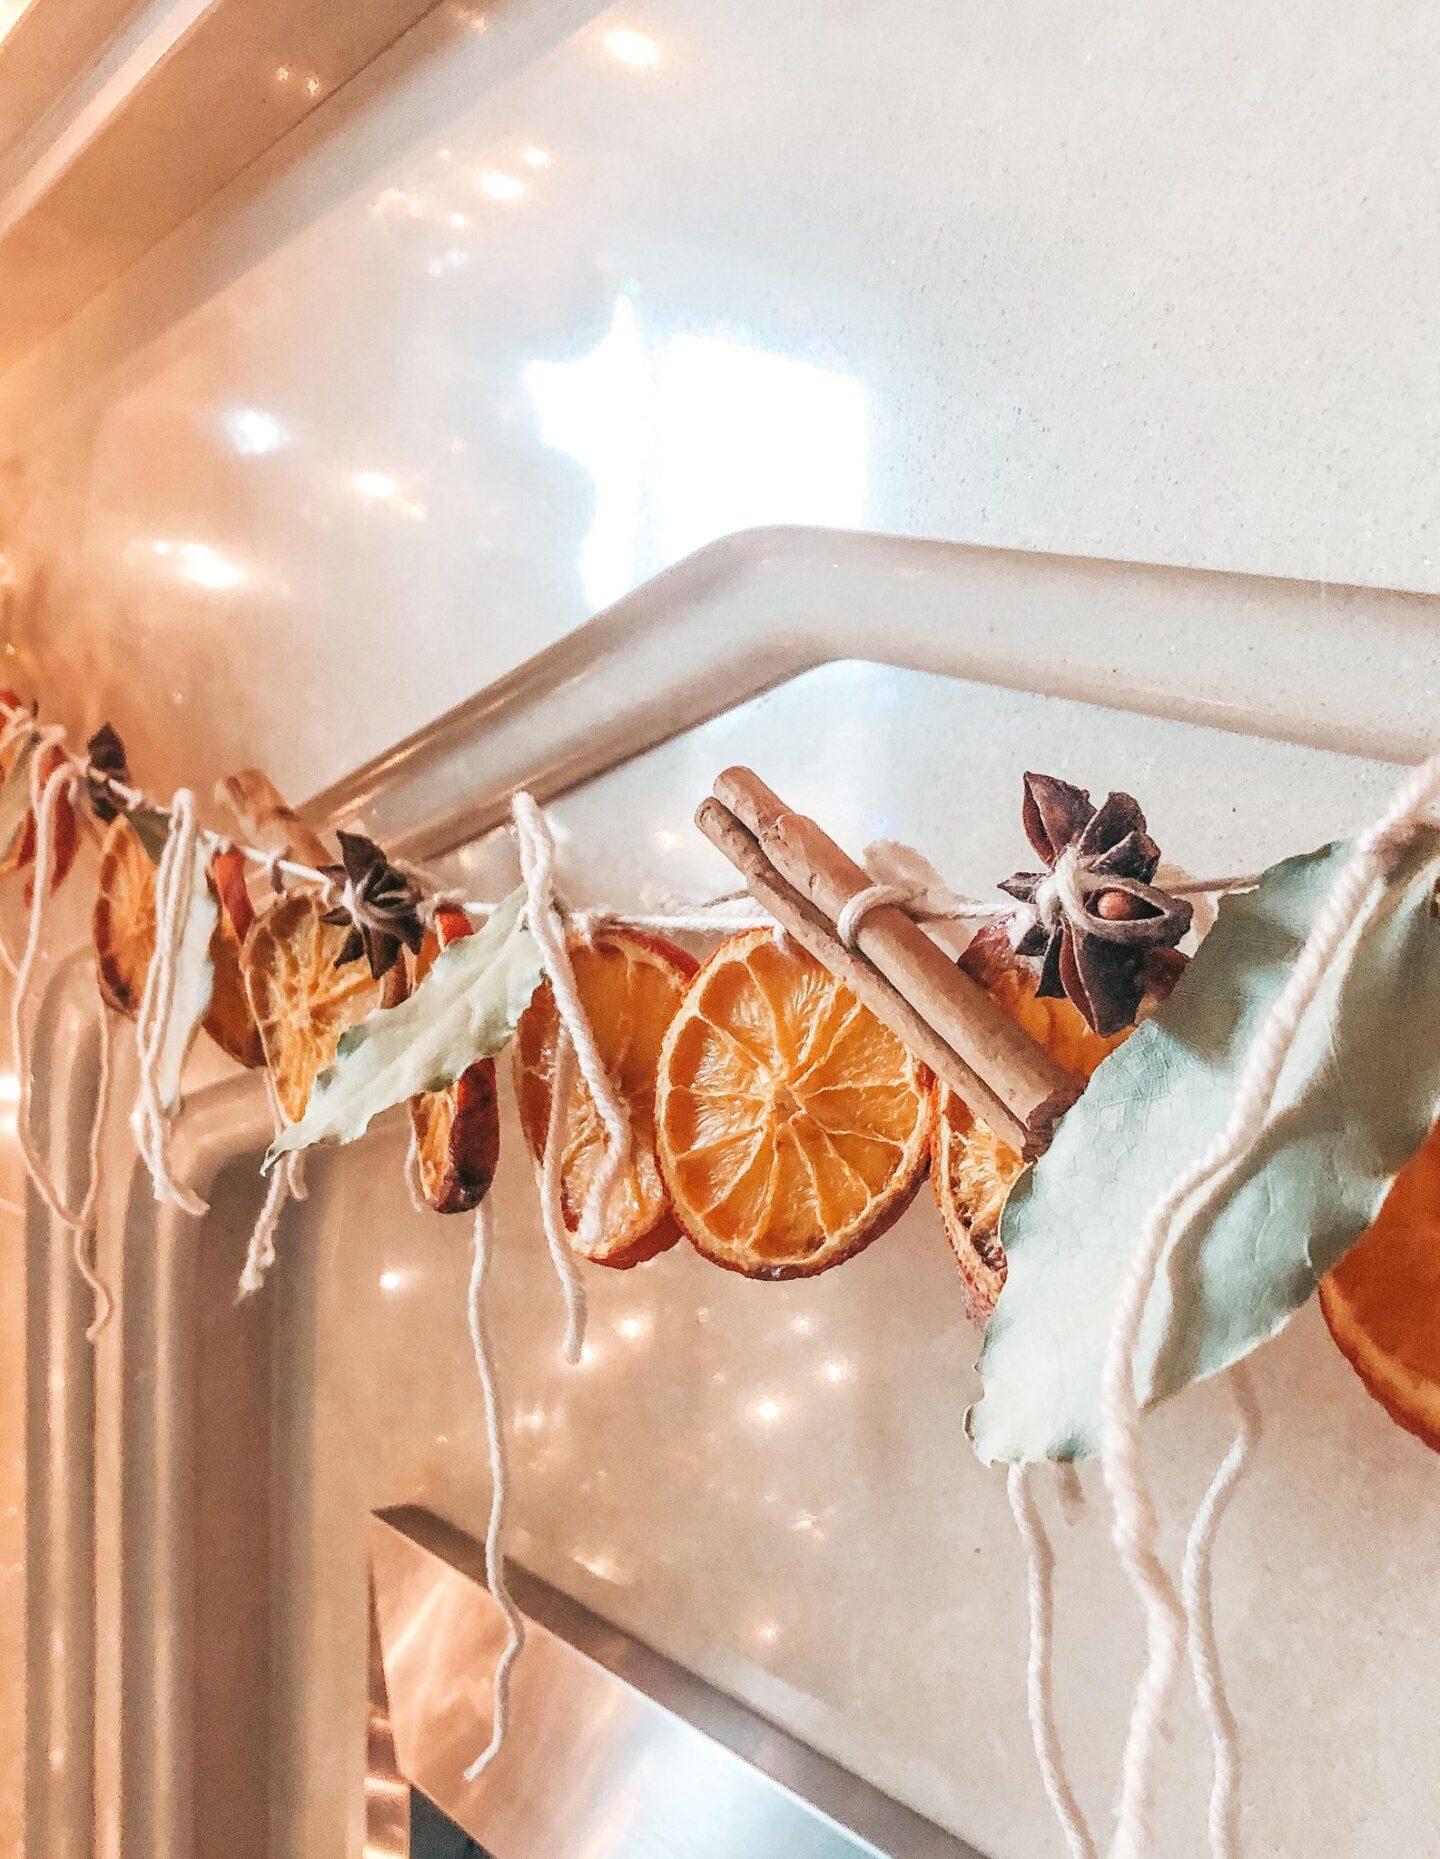
Bay leaves
Cinnamon sticks
Star Anise
A few spare oranges if you want to add the stars (I didn’t have these, but they do look so cute if you can!)

Method
Before you begin preheat the oven to a low heat, like 120oC, and line a baking tray with parchment paper. Slice the oranges into slices, around half an inch thick, and line up on the lined tray so they’re not overlapping. You may also want to blot a little with kitchen roll, and remove any large pips you can see.
Put in the oven for up to 3 hours, checking regularly to make sure your orange slices aren’t burning. Flip them over halfway through the cooking time. You can tell they’re ready when they start to look dry and go a browner colour – they should look dehydrated.
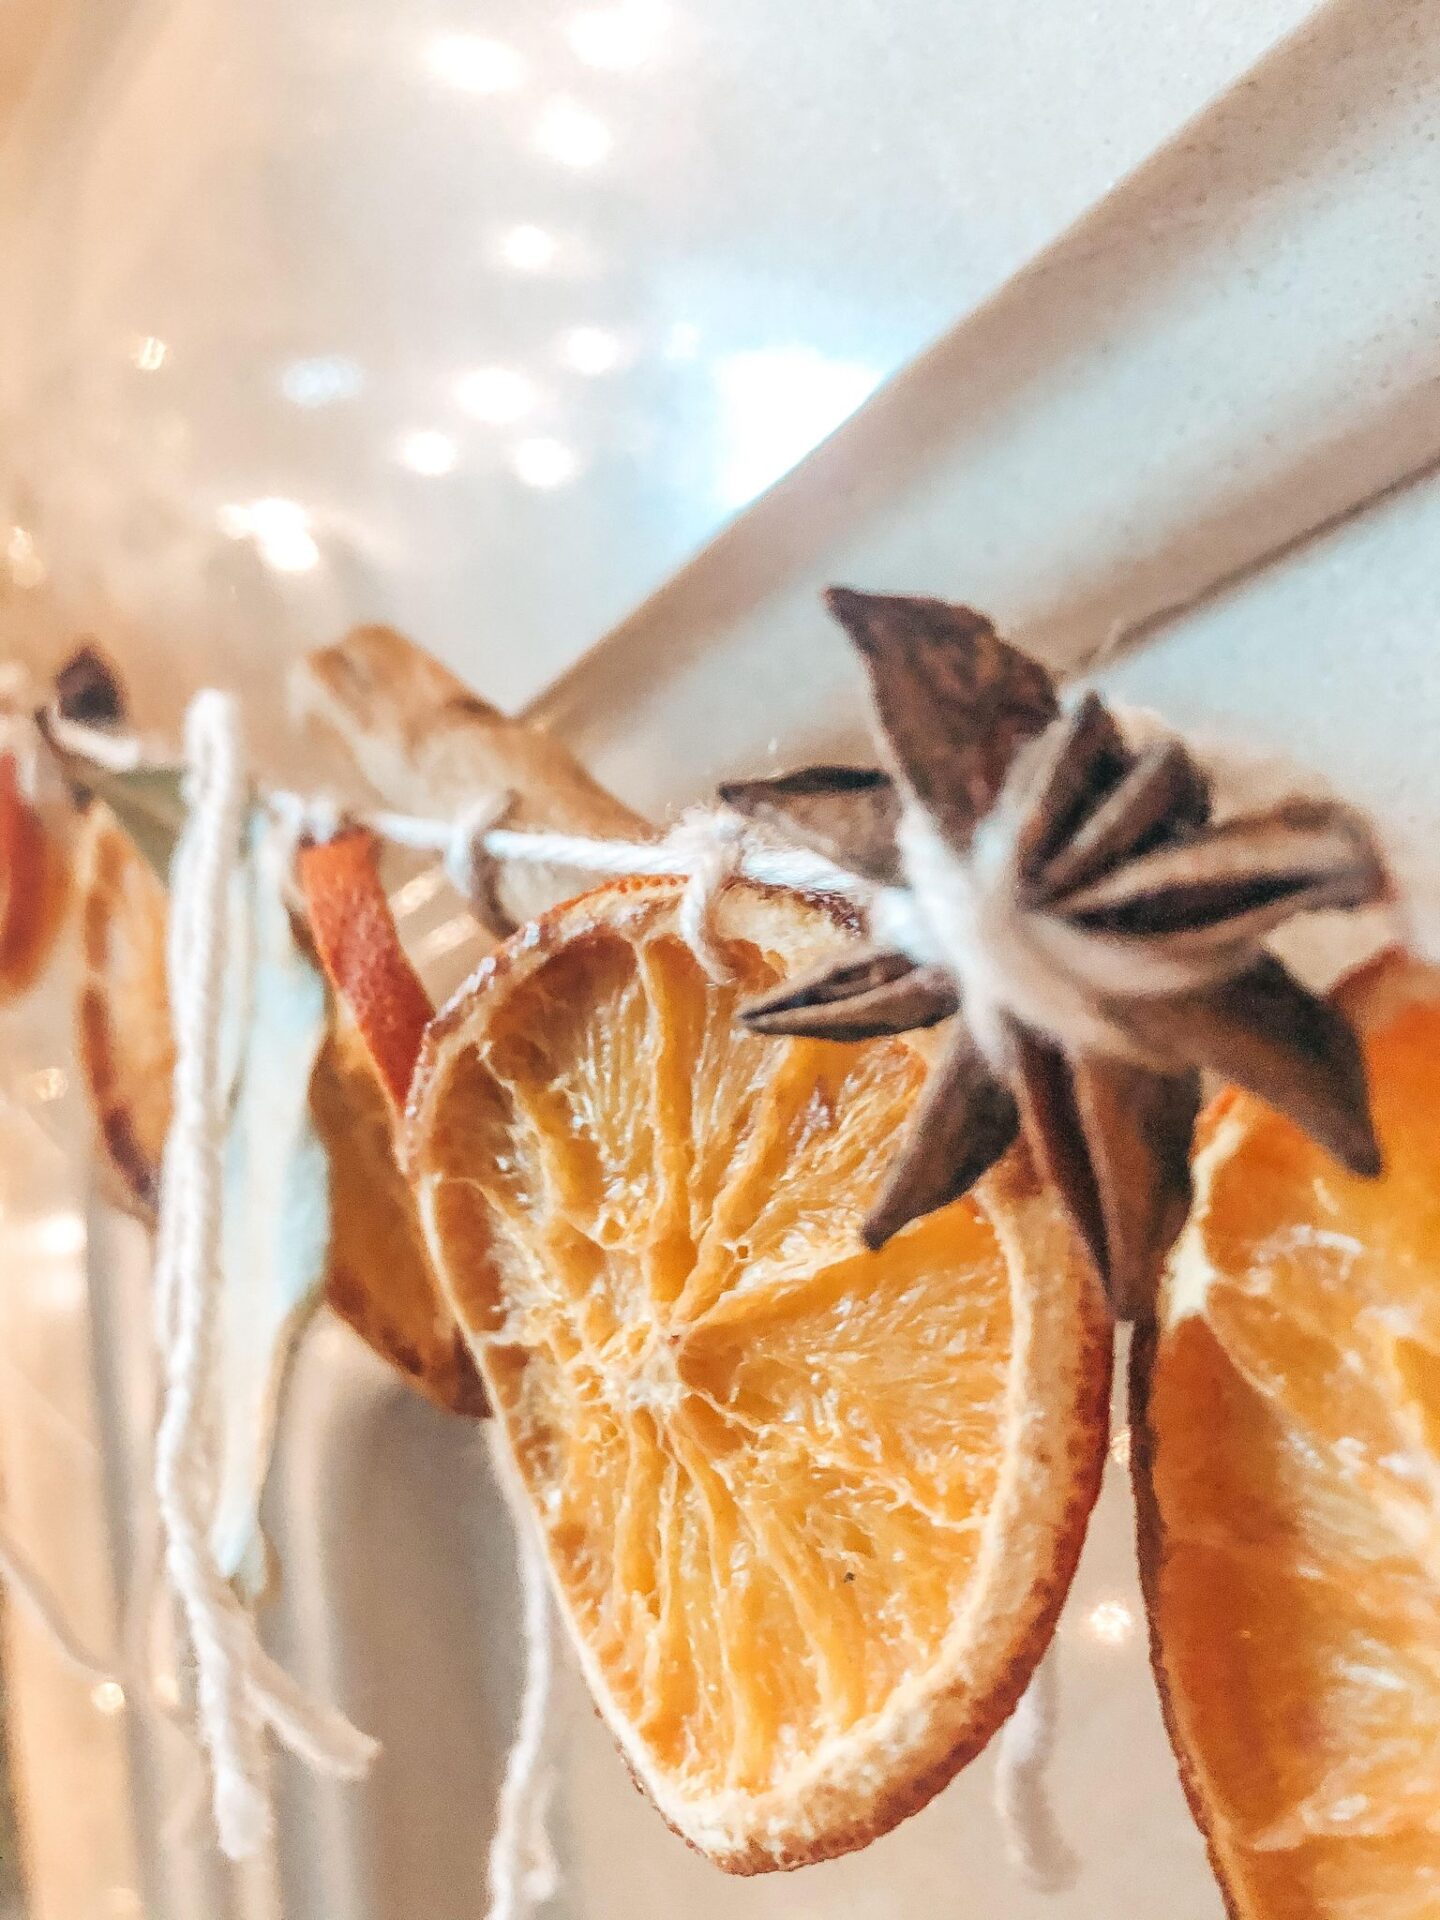
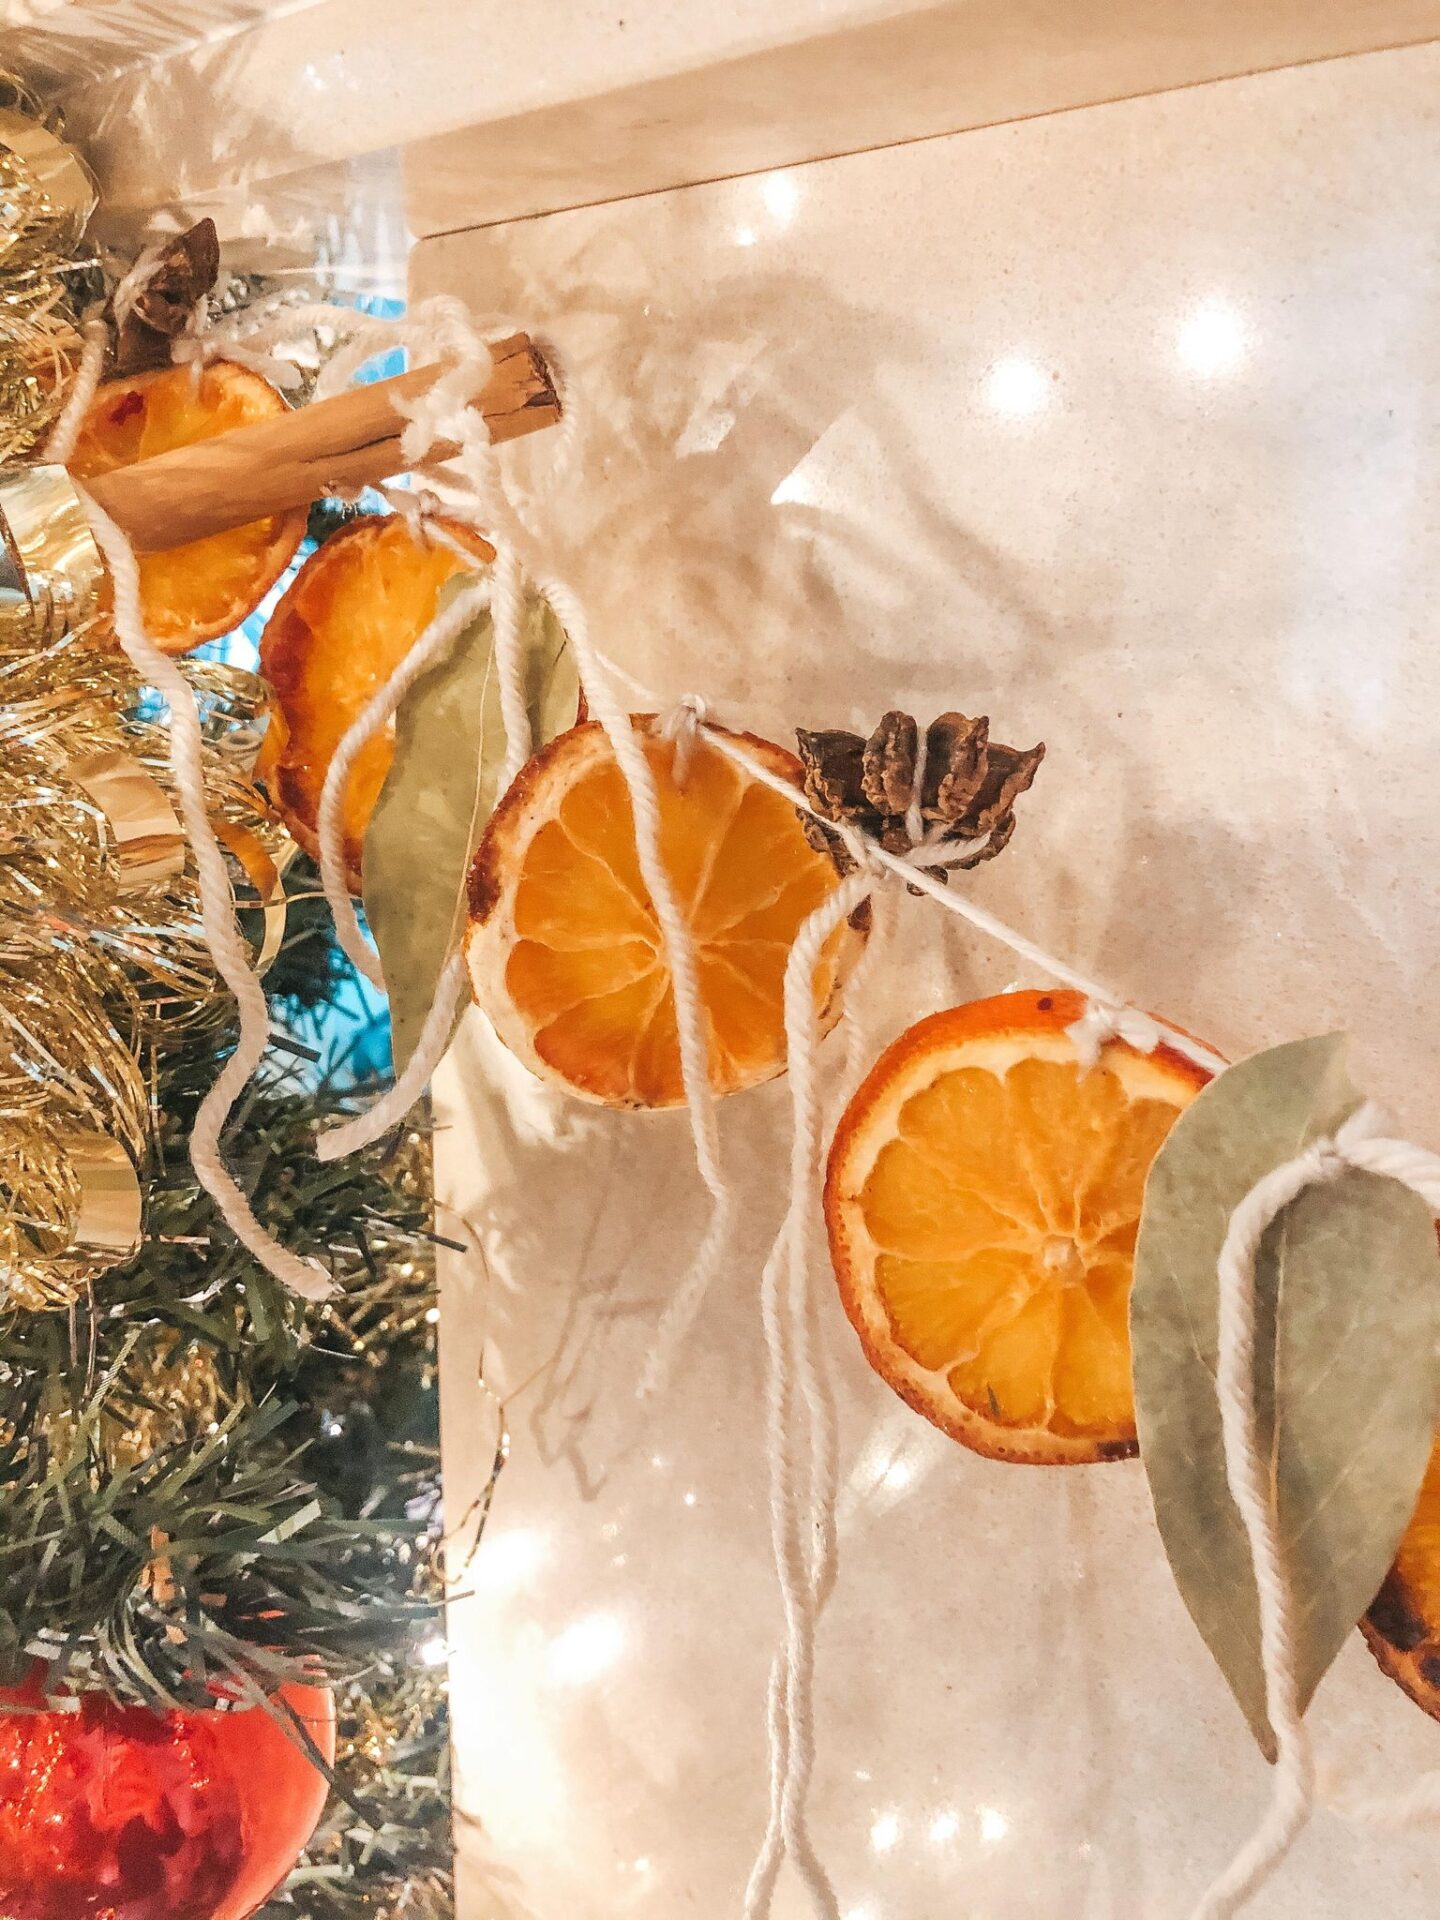
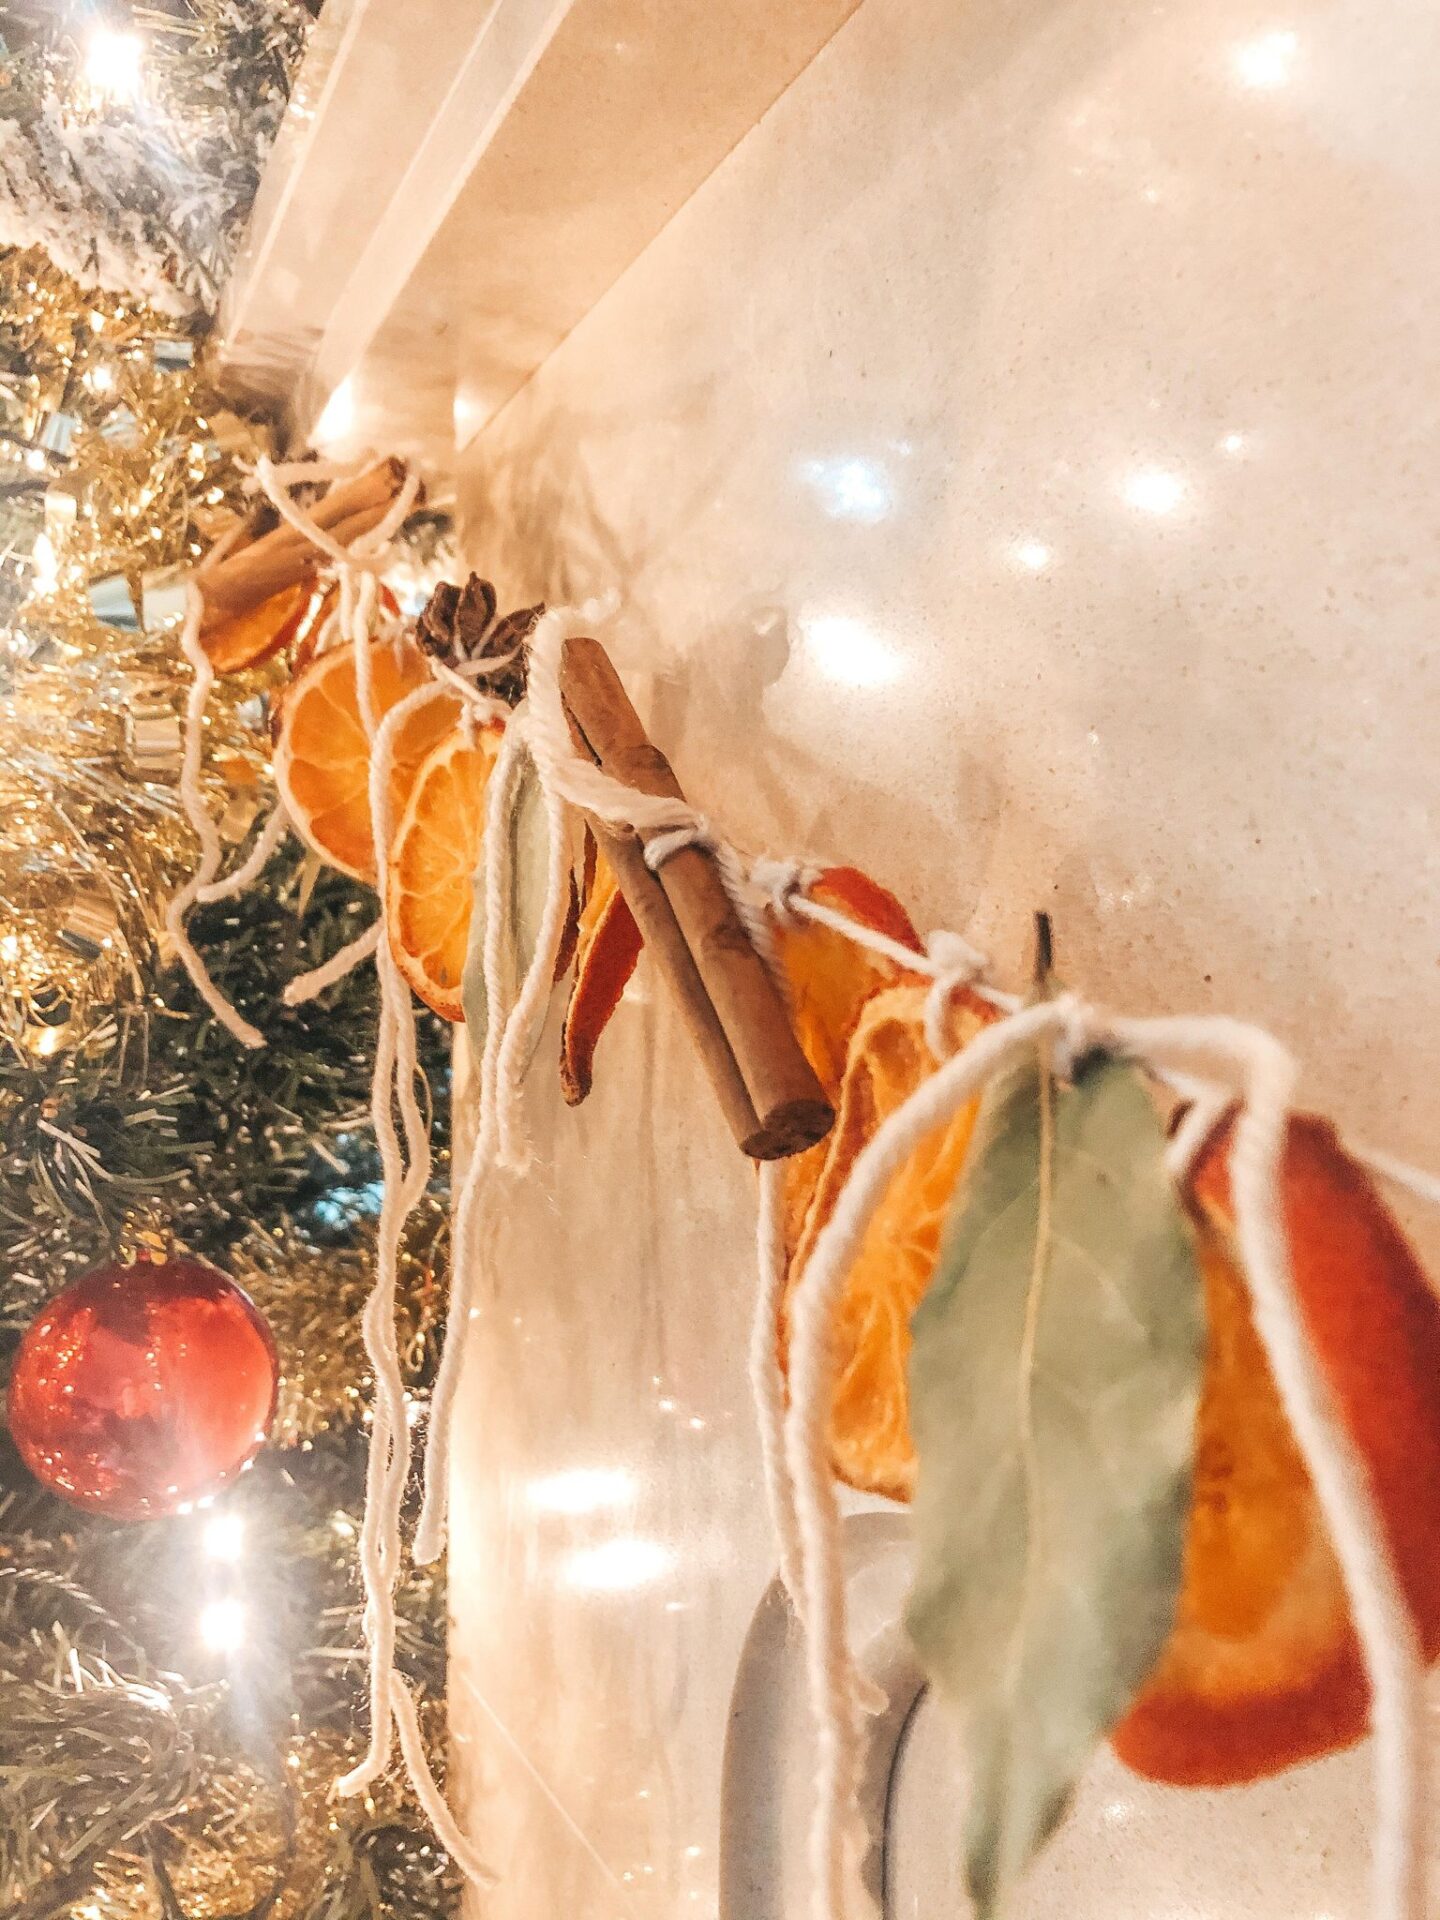
When they’re cooked, put them on a cooling rack until they’ve completely cooled. When you’re ready to start putting together your garland, carefully use a skewer to pierce a hole through the top part of each orange slice, and get your other pieces of the garland ready. Cut a piece of string/wool to the length you want it, leaving enough room at each end to tie a loop to hang it up with. Put the ingredients onto individual pieces of thread, and tie them onto the string so they’re all hanging down from the main string.
For the star anise, I found it better to wrap the thread around it a few times so it was more secure.
xx